Step 1: Set up a program:
Go to app back-end => Programs => Click Add new to create a program.

*A quick note is that we’ve already created a default program called Standard Affiliate Commission, you can freely customize this program or create your own.
On your program list, please make sure that there is one program marked as Default.
Step 2: Promote your referral link
Visit Dashboard in app back-end, you will see a link on top (or copy the link under) to send to the ones who want to register as your Affiliate.
There are two types of link: Affiliate link embedded on your domain and Link directing to Secomapp system.
To Public Affiliate Registration Form on your shop menu, refer this Document

The Affiliate follows the link to fill in some required fields.
After that, you can see their data and decide whether to accept them to be your Affiliate in the Affiliate section in the Merchant account. If everything okay, click Active for them to be your Affiliate officially.

Notice: For the details of how to register and refer customers as an Affiliate, please refer to this post: https://secomapp.zendesk.com/hc/en-us/articles/360024581612-Affiliate-Page
Step 3. Send emails to your affiliate
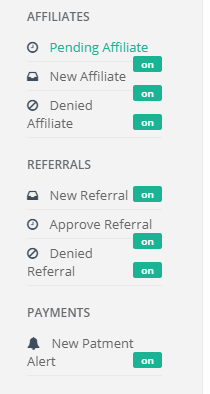
We’ve set up a number of email templates for you to send in various triggers from your affiliates’ activities.
Visit Email section in back-end to customize the content. You can also enable/disable any email by clicking on/off button in each email.

There are 7 basic email templates as follows:
|
Pending Affiliate |
Sent when the Affiliate registers an account and waits for being reviewed |
|
Approved Affiliate |
Sent when the Affiliate account is approved |
|
Denied Affiliate |
Sent when the Affiliate account is disabled |
|
New Referral |
Sent when the order from a referral of the Affiliate is marked as paid |
|
Approved Referral |
Sent when the Referral is Approved |
|
Denied Referral |
Sent when the Referral is Denied |
|
Paid Referral (Payment) |
Sent when the commission for the affiliate has been marked as paid |
Step 4. Pay your affiliate
Firstly, set up your payment method on Payment tab on Settings, choose your available payment methods and your affiliate can choose ONE from them.
Payment will be sent by merchant manually, once you sent payment to affiliate, click Mark as Paid on the Payment section and the payment status will be updated in your affiliates' Dashboard
If you have any problem while exploring the app, please drop a mail at support@secomapp.com
Comments