
At this article, we will show you how to do the delivery setting for a specific store location.
In case you want to apply for all stores, please click HERE.
Setting
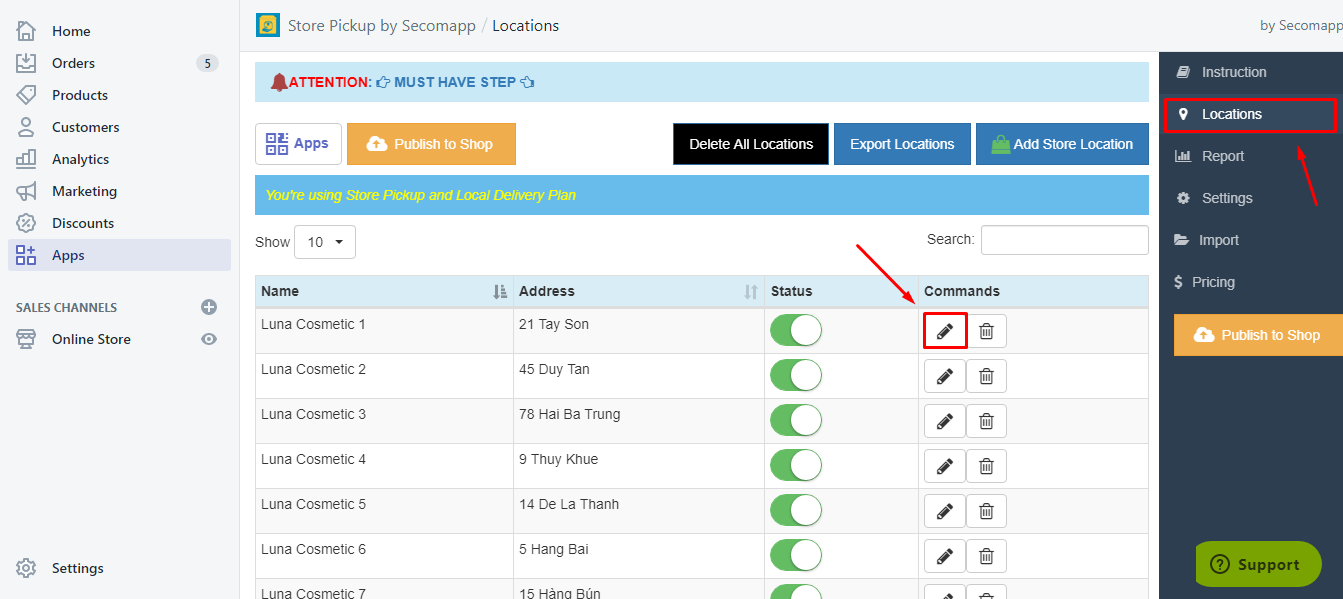
→ Go to Locations tab → Click the pencil icon ![]() of the store you want to make the setting.
of the store you want to make the setting.
→ Click Local Delivery tab to start setting with the delivery shipping option. There are 3 parts: Delivery options, Delivery rates and Delivery Time.
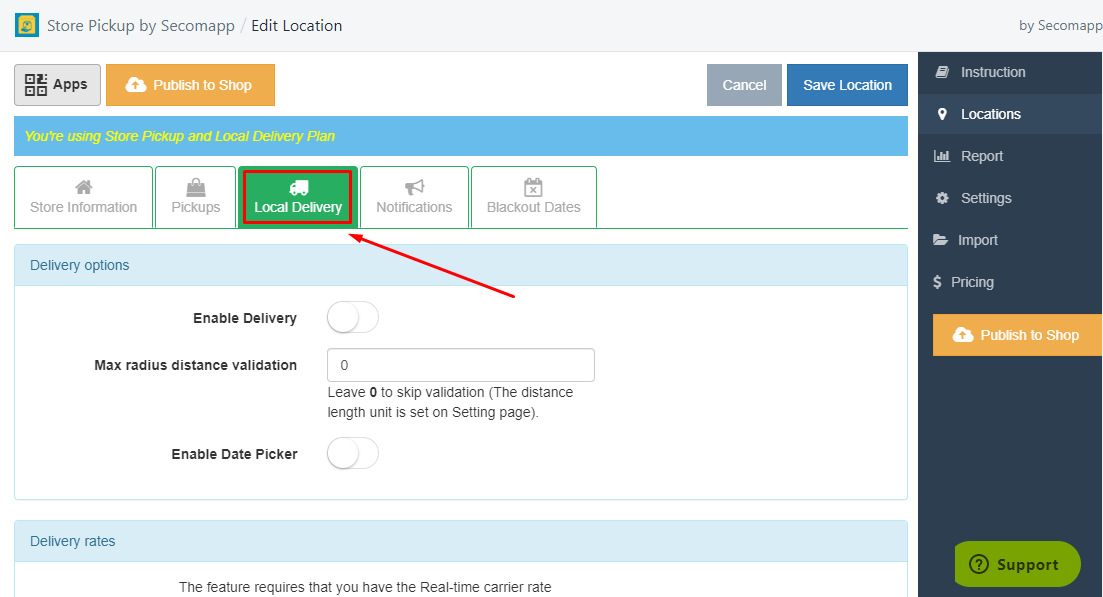
1. Delivery options
→ Enable Delivery to activate Delivery shipping option method on your website.
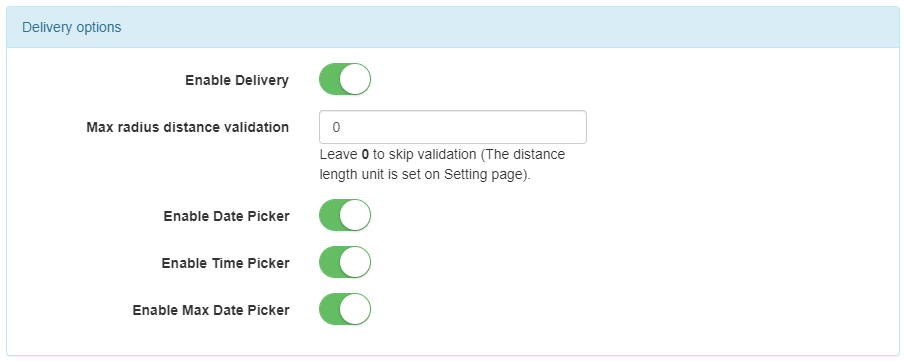
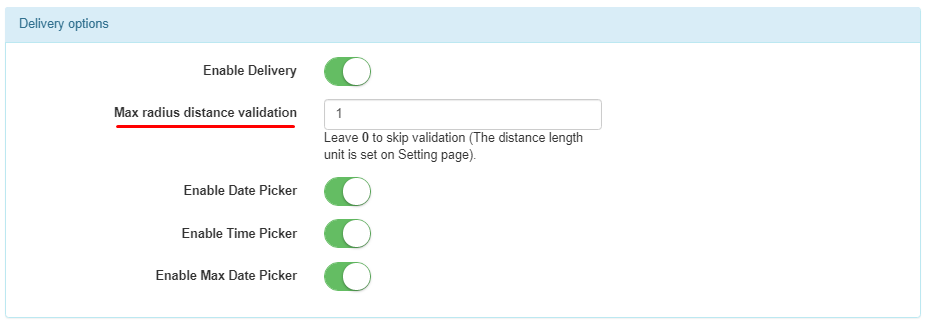
- Max radius distance validation: Enter the distance you allow to deliver. If customers address exceeding that distance, there will be no delivery service.
→ The frontend will look as follow: Addresses that are outside the delivery zone will be informed.

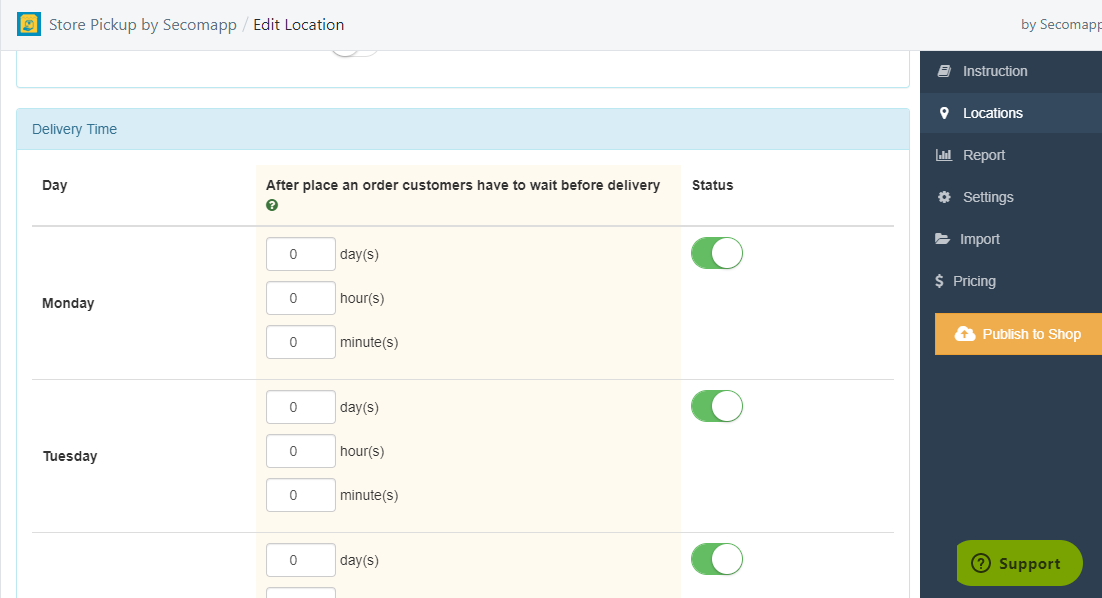
- Enable Date Picker: Turn on this and you can set the time customers have to wait before delivery after placing an order in the Delivery Time part below.
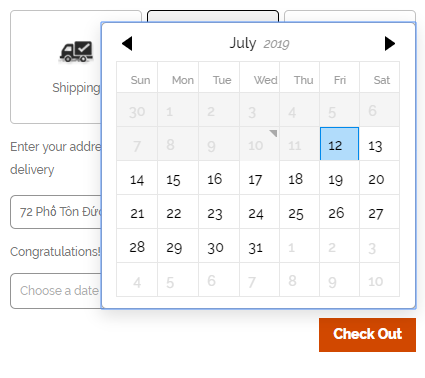
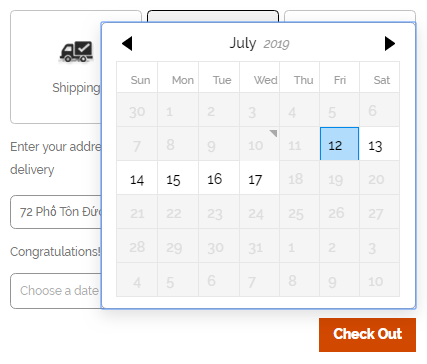
→ For example: Set 2 days. After placing orders, customers have to wait 2 days for delivery.
In this example, our customer ordered on 10 July and has to wait at least 2 days till delivery. Customers can choose a delivery day from Friday, 12 July onwards.
→ The frontend will look as follow:
- Enable Time Picker: Turn on this and you will only allow your customers to choose given delivery time slots which are after X days, Y hours and Z minutes.
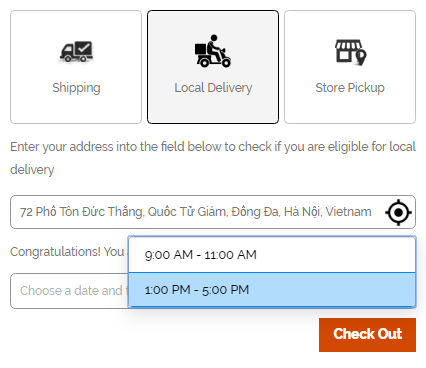
→ For example: Add 2-time slots from 9:00 AM to 11:00 AM and from 1:00 PM to 5:00 PM. Customers can choose 1 of the 2 delivery time slots.
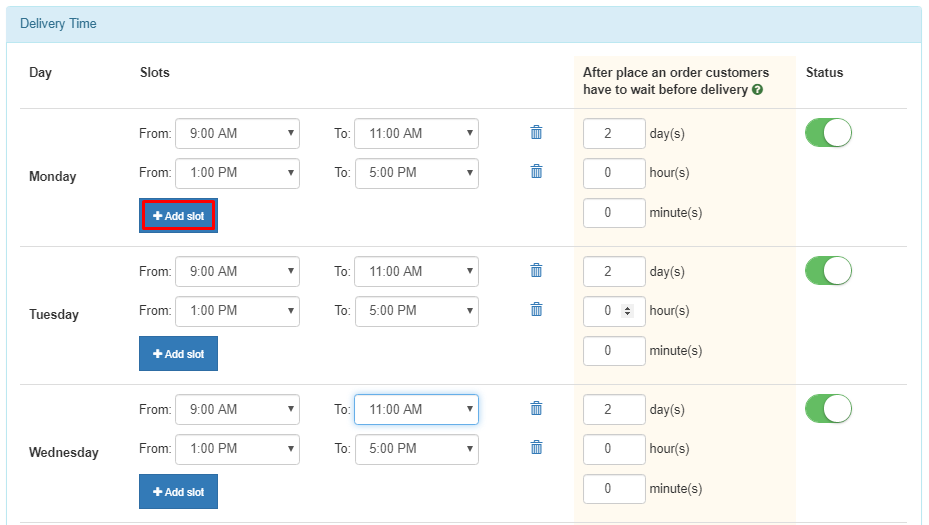
→ The frontend will look as follow:
- Enable Max Date Picker: Turn on this and you can set the time intervals between Placing an order and Delivery.
→ For example: Set the time intervals between Placing an order and Delivery equal to 7. If today is Wednesday, customers can only select delivery time slots within 7 days from now.
→ The frontend will look as follow:
2. Delivery rates
The feature requires that you have the Real-time carrier rate feature enabled on your Shopify account.
- Free option: You can ask Shopify support team to update your billing cycle to “Yearly” and the real-time feature will be activated for you with NO CHARGE.
- $20/month option: You can ask Shopify support to add the Real-time carrier shipping feature ala carte for you. You will be charged $20/month for this.
- Upgrade to Advanced Shopify or Shopify Plus: You can change your Shopify plan to “Advance” or “Plus”, the Real-time carrier rate feature will be auto-updated to your shop.
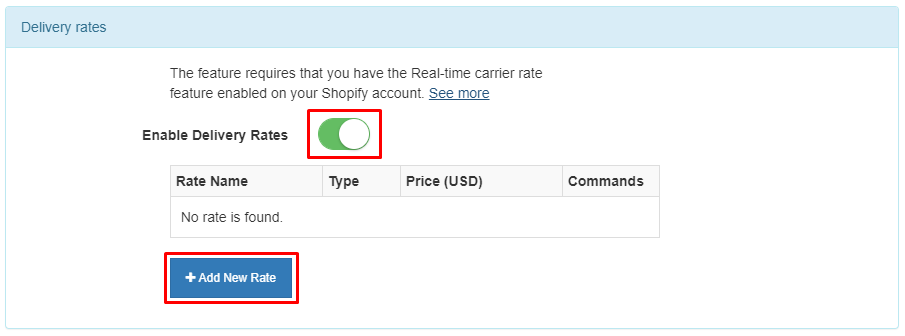
→ Enable Delivery Rates to set the delivery price condition at a certain price/weight range of the product. → Click + Add New Rate
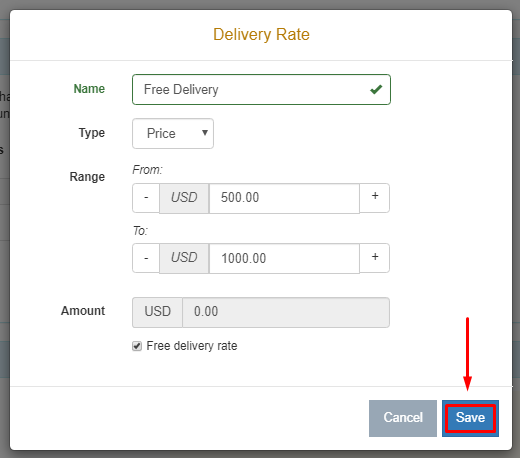
→ For example: Set Free Delivery condition for customers who buy products from price range $500.00 to $1000.00. → Click Save!
On the website, a customer buys products with a total price of $797.50, which meets the Delivery rate condition above. So there will be Free Delivery.
→ The frontend will look as follow:

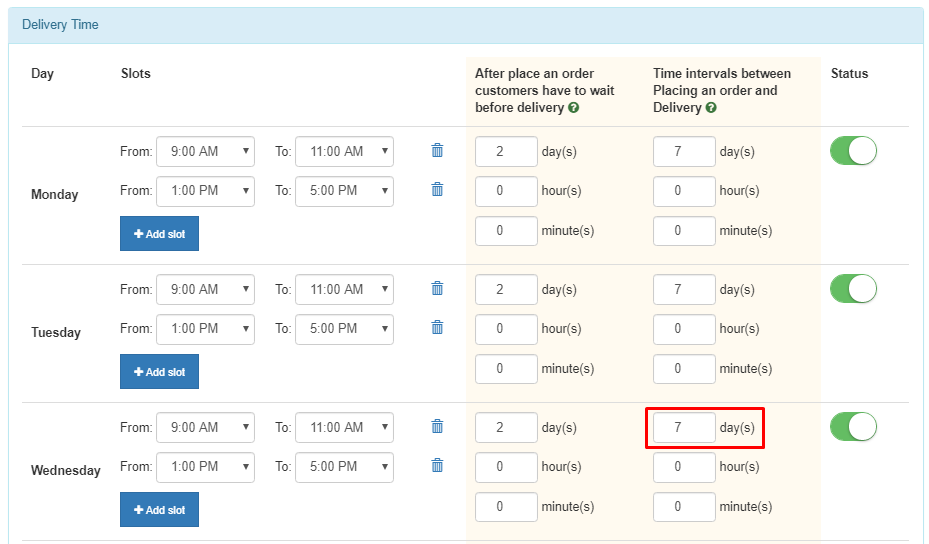
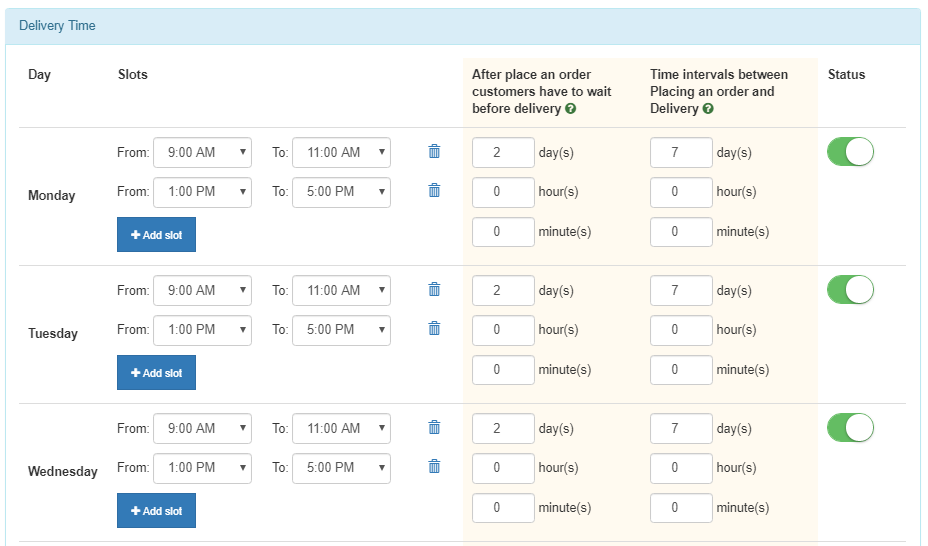
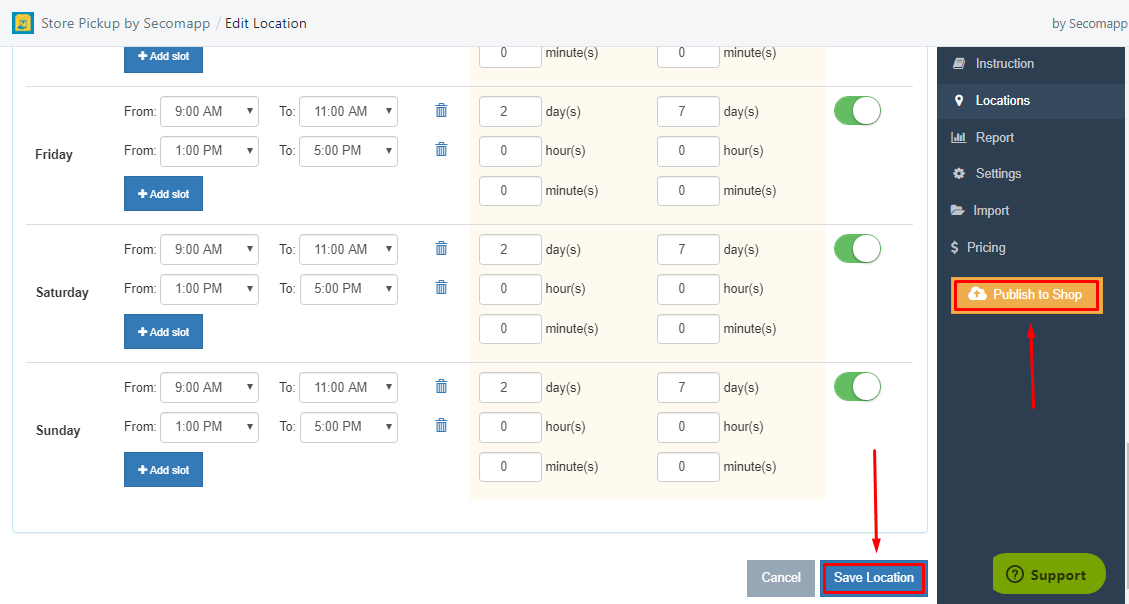
3. Delivery Time
- In this part, you’re able to customize the available delivery slots, the waiting time before delivery after customer placing an order and the time intervals between Placing an order and Delivery for each day in the week like the examples above.
Finally, please remember to click Save Location and Publish to Shop button after finishing any setting!
Comments